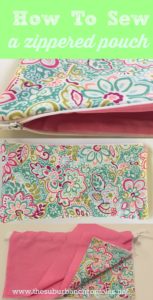
Nobody can have too many zippered pouches. With countless ways to use them, they are a great beginner sewing project. Make them for yourself, or give them as gifts!
Whether for make-up, sunscreen, personal products, pens and pencils, or my phone, I have zippered pouches in a variety of shapes and sizes. They also make great gifts.
Believe it or not, sewing a pouch is one of the easiest beginner projects out there, despite involving a zipper. I learned through practice that zippers are intimidating, but not hard. Pouches are great too because they don’t require a lot of fabric, so you can use a pricey type that you love or use up scraps from bigger projects.
Let’s get started. Let me begin by saying that you don’t have to buy a pattern. Get a sense of what size you’d like, then measure about an inch more to the length and the width of your desired size. I prefer to use 100% cotton fabrics because you can wash them and let them air dry. If you use another type that is fine too, just be sure to spot clean only.
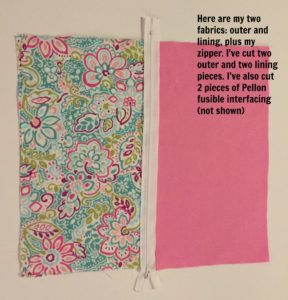
I decided to cut mine to be 13 x 7.5, giving me a finished length of around 12 x 6.5. I started by cutting out 4 pieces of fabric- 2 outside pieces and 2 lining pieces. I also added fusible interfacing to my outside fabric, which is not shown in my photos. Fusible interfacing is ironed on to your fabric using steam, and will give your pouch some nice thickness. To learn about how to apply fusible interfacing, read more here.
Next, I got a white zipper ready to go, and I purposely chose one longer than the length of my pouch (don’t worry, you can trim it later).
The trick to getting this right is layering the fabric correctly and paying attention as you go. Even after years of making these, sometimes I still have to remind myself.
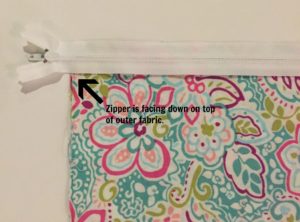
For the first step, place one piece of the outer fabric face up. Now, center your zipper, facing DOWN on top of that first piece.
On top of your zipper, place one piece of the lining fabric face DOWN on top of the zipper. I forgot to take a picture here, but the top of the pink piece needs to line up with the top of the zipper. Now your first three pieces are ready to sew! Using your zipper foot, stitch using the 3/8 in. seam allowance and carefully sew together.
When you are done, it will look like this:
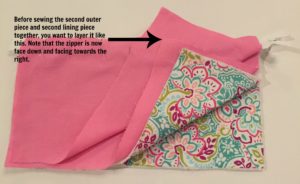
Everything is coming along, but since we only have half of the bag put together, we need to assemble the rest. Begin by putting the second piece of the outer fabric face up. Now, flip over your sewn section so that your zipper is facing down and to the RIGHT and gently place this onto the outer fabric. Lastly, take the second liner piece and place it face DOWN on top. The pieces that are already sewn will be hanging down a bit, but not to worry. Remember, now you are attaching the zipper to the second two pieces only. Note: I like to pin things in place and/or press everything with a hot iron as I go to keep it evenly lined up.
Sew the second side to the zipper, again using the 3/8 in. seam allowance.
Check that it looks like this when you are done.
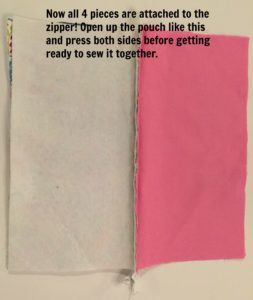
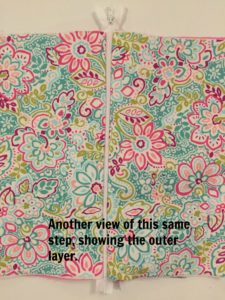
The outer fabric right side pieces and the lining right side pieces should each be facing one another. This is always one of my favorite steps because it’s starting to actually look like a bag! Here’s another view of this same step:
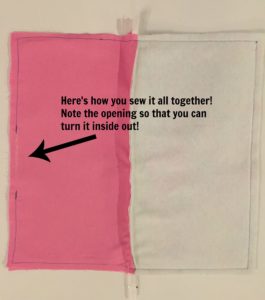
Next, we move on to the final assembly part of the project. Lay it out, separating the sides. Be SURE to unzip your zipper about 1/2 to 3/4 of the way (very important!), and also press the ends of the zipper down a bit so they will sew into place neatly. Now, sew a 3/8 in. seam all the way around, starting with the lining, being sure to leave a 3-4 inch opening in your lining so that you can turn everything inside out when you are done. (Note: you can switch back to your regular sewing foot now!). You can see that I used blue thread for this step to hopefully make it easier for you to see my work.
When you’ve sewn that all together, trim off the ends of each zipper. Also, clip your corners neatly. This will make them more square when you turn them out.
Use either a pen (with the top on!) or a chopstick to gently push out and shape each corner.
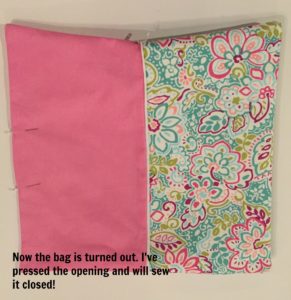
Turn the pouch inside out, slowly working everything through that lining opening. I usually press the lining opening at this point before neatly sewing it up using a 1/8 inch seam allowance.
You are DONE! How fun and easy was that? Can you do this? Of course! How cute is the pouch?
Have fun sewing!


